Configuration#
Configuration and customization of Sphinx-Gallery is done primarily with a
dictionary specified in your conf.py file. A list of the possible
keys are listed below and explained in
greater detail in subsequent sections.
When using these flags, it is good practice to make sure the source Python files
are equivalent to the generated HTML and iPython notebooks (i.e. make sure
.py == .html == .ipynb). This principle should be violated only when
necessary, and on a case-by-case basis.
Configuration options#
Global conf.py configurations#
Sphinx-Gallery configuration options that can be set in the Sphinx conf.py
file, inside a sphinx_gallery_conf dictionary.
Gallery files and ordering
examples_dirsandgallery_dirs(Manage multiple galleries)filename_pattern,ignore_pattern,example_extensions, andfiletype_parsers(Parsing and executing examples via matching patterns)copyfile_regex(Manually passing files)subsection_order(Sorting gallery subsections)within_subsection_order(Sorting gallery examples)nested_sections(Nesting gallery sections)
Example execution
reset_argv(Passing command line arguments to example scripts)capture_reprandignore_repr_types(Controlling what output is captured)plot_gallery(Building without executing examples)run_stale_examples(Rerunning stale examples)abort_on_example_error(Abort build on first fail)expected_failing_examples(Don’t fail the build if specific examples error)only_warn_on_example_error(Never fail the build on error)reset_modulesandreset_modules_order(Resetting modules)parallel(Build examples in parallel)
Diverging from Jupyter
Sphinx-gallery attempts to render examples to HTML in a manner largely consistent with what a user will experience when they download the corresponding .ipynb notebook file and run it locally.
Some options, such as 'capture_repr': (),, will make these behaviors less consistent.
Consider using these options sparingly as it could lead to confusion or sub-optimal experiences for users!
Cross-referencing
reference_url,prefer_full_module(Add intersphinx links to your examples)backreferences_dir,doc_module,exclude_implicit_doc, andinspect_global_variables(Add mini-galleries)minigallery_sort_order(Sort mini-gallery thumbnails from files)
Images and thumbnails
default_thumb_file(Using a custom default thumbnail)thumbnail_size(Setting gallery thumbnail size)image_srcset(Multi-resolution images)image_scrapers(Image scrapers)compress_images(Compressing images)
Compute costs
min_reported_time(Minimal reported time)write_computation_times(Write computation times)show_memory(Showing memory consumption)junit(Using JUnit XML files)
Jupyter notebooks and interactivity
notebook_extensions(Controlling notebook download links)promote_jupyter_magic(Making cell magic executable in notebooks)first_notebook_cellandlast_notebook_cell(Add your own first and last notebook cell)notebook_images(Adding images to notebooks)pypandoc(Using pypandoc to convert reST to markdown)binder(Generate Binder links for gallery notebooks (experimental))jupyterlite(Generate JupyterLite links for gallery notebooks (experimental))
Appearance
line_numbers(Adding line numbers to examples)remove_config_comments(Removing config comments)show_signature(Show signature)download_all_examples(Disabling download button of all scripts)
Miscellaneous
recommender(Enabling the example recommender system)log_level(Setting log level)show_api_usageandapi_usage_ignore(Showing API Usage)
Configurations inside examples#
Some options can also be set or overridden on a file-by-file basis:
# sphinx_gallery_line_numbers(Adding line numbers to examples)# sphinx_gallery_thumbnail_number(Choosing the thumbnail image)# sphinx_gallery_thumbnail_path(Providing an image for the thumbnail image)# sphinx_gallery_failing_thumbnail(Controlling thumbnail behaviour in failing examples)# sphinx_gallery_dummy_images(Generating dummy images)# sphinx_gallery_capture_repr(Controlling what output is captured)# sphinx_gallery_multi_image(Controlling the layout of multiple figures from the same code block)# sphinx_gallery_tags(Tagging Examples and Filtering)
Some options can be set on a per-code-block basis in a file:
# sphinx_gallery_capture_repr_block(Controlling what output is captured)# sphinx_gallery_defer_figures(Using multiple code blocks to create a single figure)# sphinx_gallery_multi_image_block(Controlling the layout of multiple figures from the same code block)
Some options can be set on a per-line basis in a file:
- # sphinx_gallery_start_ignore and # sphinx_gallery_end_ignore (Hiding lines of code)
See also Removing config comments to hide config comments in files from the rendered examples.
Build options#
Configuration options can be set at build time via the
Sphinx build -D
command line option. This overrides the value set in your conf.py file for that
configuration. Values set in your conf.py are effectively the ‘default’,
as it takes lower precedence than values passed via the -D build option.
You can also use the -D option in your Makefile to create useful targets,
for example:
make html-noplot(Building without executing examples)make html_abort_on_example_error(Abort build on first fail)
Note
If you wish to use the -D build option to pass an instantiated class, class or
function as a configuration value, you can do so by passing a fully qualified name
string to the object. See Importing callables for details.
CSS changes#
Some things can be tweaked directly in CSS:
.sphx-glr-thumbcontainer(Setting gallery thumbnail size)
Removing warnings#
To prevent warnings from being captured and included in your built
documentation, you can use the package warnings in the conf.py file.
For example, to remove the specific Matplotlib agg warning, you can add:
import warnings

warnings.filterwarnings("ignore", category=UserWarning,
                        message='Matplotlib is currently using agg, which is a'
                                ' non-GUI backend, so cannot show the figure.'
                                '|(\n|.)*is non-interactive, and thus cannot be shown')
to your conf.py file.
Note that the above Matplotlib warning is removed by default.
Importing callables#
Sphinx-Gallery configuration values that are instantiated classes, classes or functions should be passed as fully qualified name strings to the objects. The object needs to be importable by Sphinx-Gallery.
Two common ways to achieve this are:
Define your object with your package. For example, you could write a function
def my_sorterand put it inmymod/utils.py, then use:sphinx_gallery_conf = { #..., "minigallery_sort_order": "mymod.utils.my_sorter", #... }
Define your object with your documentation. For example, you can add documentation-specific stuff in a different path and ensure that it can be resolved at build time. For example, you could create a file
doc/sphinxext.pyand define your function:def plotted_sorter(fname): return not fname.startswith("plot_"), fname
And set in your configuration:
sys.path.insert(0, os.path.dirname(__file__))

sphinx_gallery_conf = {
#...,
"minigallery_sort_order": "sphinxext.plotted_sorter",
#...
}
And Sphinx-Gallery would resolve
"sphinxext.plotted_sorter"to theplotted_sorterobject because thedoc/directory is first on the path.
Built in classes like sphinx_gallery.sorting.FileNameSortKey and similar can
be used with shorter direct alias strings like "FileNameSortKey" (see
Sorting gallery examples for details).
Note
Sphinx-Gallery >0.16.0 supports use of fully qualified name strings as a response
to the Sphinx >7.3.0 changes to caching and serialization checks of the
conf.py file.
This means that the previous use of class instances as configuration values to
ensure the __repr__ was stable across builds is redundant if you are passing
configuration values via name strings. When using name strings, the configuration
object can just be a function.
Custom sort keys#
You can create a custom sort key callable for the following configurations:
subsection_order - to reorder subsections (sub-galleries) (passed subsection folder paths relative to the
conf.pyfile)within_subsection_order - to reorder gallery items within (sub)sections (passed filenames)
minigallery_sort_order - to reorder minigallery items (passed full paths to example files and backreference files)
The best way to do this is to define a sort function, that takes the passed path
string. For example, this function puts all filenames starting with plot_ before
all other filenames:
def plotted_sorter(fname):
    return (not fname.startswith("plot_"), fname)
Then make sure it is importable (see Importing callables) and set your configuration:
sphinx_gallery_conf = {
#...,
"minigallery_sort_order": "sphinxext.plotted_sorter",
#...
}
For backwards compatibility you can also set your configuration to be a callable
object but you will have to ensure that the __repr__ is stable across runs.
See Ensuring a stable __repr__ for details.
If you do this, we recommend that you use the
sphinx_gallery.sorting.FunctionSortKey
because it will ensure that the __repr__ is stable across runs.
sphinx_gallery.sorting.FunctionSortKey takes a function on init.
You can create your sort key callable by instantiating a
FunctionSortKey instance with your sort key
function. For example, the following minigallery_sort_order configuration
(which sorts on paths) will sort using the first 10 letters of each filename:
sphinx_gallery_conf = {
#...,
"minigallery_sort_order": FunctionSortKey(
    lambda filename: filename[:10]),
#...
}
Ensuring a stable __repr__#
For backwards compatibility Sphinx-Gallery allows certain configuration values to be a callable object instead of a importable name string.
If you wish to use a callable object you will have to ensure that the __repr__
is stable across runs. Sphinx determines if the build environment has
changed, and thus if all documents should be rewritten, by examining the
config values using md5(str(obj).encode()).hexdigest() in
sphinx/builders/html.py. Default class instances in Python have their
memory address in their __repr__ which is why generally the __repr__
changes in each build.
Your callable should be a class that defines a stable __repr__ method.
For example, sphinx_gallery.sorting.ExplicitOrder stability is
ensured via the custom __repr__:
def __repr__(self):
    return '<%s: %s>' % (self.__class__.__name__, self.ordered_list)
Therefore, the files are only all rebuilt when the specified ordered list is changed.
Manage multiple galleries#
To specify the locations of your input and output gallery folder(s), use the following Sphinx-Gallery configuration dictionary keys:
examples_dirs(folder where source example files are)gallery_dirs(folder where output files should be placed)
Both configurations take list of directory paths, relative to the conf.py file.
They can be set in your Sphinx conf.py file:
sphinx_gallery_conf = {
    ...
    'examples_dirs': ['../examples', '../tutorials'],
    'gallery_dirs': ['auto_examples', 'tutorials'],
}
Keep in mind that both lists should be of the same length.
Each folder in examples_dirs will be built into an examples gallery. Subfolders
within each examples_dirs will be built into gallery subsections (sub-galleries)
of the parent gallery.
Sphinx-Gallery only supports one level of subfolder nesting in its gallery directories. For example our Basics Gallery with Matplotlib, has the parent gallery in examples/ and the subsection (aka sub-gallery) in examples/no_output/. Further sub-folders are not supported. This might be a limitation for you, or you might want to have separate galleries for different purposes, e.g., an examples gallery and a tutorials gallery.
Note
If your examples take a long time to run, consider looking at the execution times file that is generated for each gallery dir (as long as any examples were actually executed in that directory during the build) and globally for all galleries.
Parsing and executing examples via matching patterns#
By default, Sphinx-Gallery will parse and add all files with a .py
extension to the gallery, but only execute files beginning with plot_.
These behaviors are controlled by the ignore_pattern, filename_pattern,
and example_extensions entries, which have the default values:
sphinx_gallery_conf = {
    ...
    'filename_pattern': '/plot_',
    'ignore_pattern': r'__init__\.py',
    'example_extensions': {'.py'}
}
To omit some files from the gallery entirely (i.e., not execute, parse, or
add them), you can change the ignore_pattern option.
To choose which of the parsed and added Python scripts are actually
executed, you can modify filename_pattern. For example:
sphinx_gallery_conf = {
    ...
    'filename_pattern': '/plot_compute_',
}
will build all examples starting with plot_compute_. The key
filename_pattern (and ignore_pattern) accepts regular expressions
which will be matched with the full path of the example. This is the reason
the leading '/' is required. Users are advised to use re.escape(os.sep)
instead of '/' if they want to be agnostic to the operating system.
The filename_pattern option is also useful if you want to build only a
subset of the examples. For example, you may
want to build only one example so that you can link it in the documentation.
In that case, you would do:
sphinx_gallery_conf = {
    ...
    'filename_pattern': r'plot_awesome_example\.py',
}
Here, one should escape the dot r'\.' as otherwise python
regular expressions matches any character. Nevertheless, as
one is targeting a specific file, it would match the dot in the filename even
without this escape character.
Note
Sphinx-Gallery only re-runs examples that have changed (according to their md5 hash). See Rerunning stale examples below for information.
Similarly, to build only examples in a specific directory, you can do:
sphinx_gallery_conf = {
    ...
    'filename_pattern': '/directory/plot_',
}
Alternatively, you can skip executing some examples. For example, to skip
building examples starting with plot_long_examples_, you would do:
sphinx_gallery_conf = {
    ...
    'filename_pattern': '/plot_(?!long_examples)',
}
As the patterns are parsed as regular expressions, users are advised to consult the regular expressions module for more details.
Note
Remember that Sphinx allows overriding conf.py values from the command
line, so you can for example build a single example directly via something
like:
$ sphinx-build -D sphinx_gallery_conf.filename_pattern=plot_specific_example\.py ...
You can also parse and highlight syntax examples in other languages by adding their
extensions to example_extensions, though they will not be executed. For example, to
include examples in Python, Julia, and C++:
sphinx_gallery_conf = {
    ...
    'example_extensions': {'.py', '.jl', '.cpp'}
}
Parsing and syntax highlighting is supported by the Pygments library, with the language
determined by the file extension. To override Pygments’ default file associations, the
filetype_parsers option can be used to specify a dict mapping any of the file
extensions in example_extensions to any of the pygments language names. For example:
sphinx_gallery_conf = {
    ...
    'filetype_parsers': {'.m': 'Matlab'}
}
Rerunning stale examples#
By default, Sphinx-Gallery only rebuilds examples that have changed.
For example, when starting from a clean doc/ directory, running your HTML
build once will result in Sphinx-Gallery executing all examples that match your
given filename/ignore patterns. Then, running
the exact same command a second time should not run any examples, because the
MD5 hash of each example will be checked against the MD5 hash (saved to disk
as <filename>.md5 in the generated directory) that the example file had
during the first build. These will match and thus the example will be
determined to be “stale”, and it will not be rebuilt by Sphinx-Gallery.
This design feature allows for more rapid documentation iteration by only
rebuilding examples when they change.
However, this presents a problem during some modes of debugging and
iteration. Let’s say that you have one particular
example that you want to rebuild repeatedly while modifying some function in
your underlying library but do not want to change the example file contents
themselves. To do this, you’d either need to make some change (e.g., add/delete
a newline) to your example or delete the .md5 file to force Sphinx-Gallery
to rebuild the example. Instead, you can use the configuration value:
sphinx_gallery_conf = {
    ...
    'run_stale_examples': True,
}
With this configuration, all examples matching the filename/ignore pattern will be rebuilt, even if their MD5 hash shows that the example did not change. You can combine this with filename/ignore patterns to repeatedly rerun a single example. This could be done from the command line, for example:
$ make html SPHINXOPTS="-D sphinx_gallery_conf.run_stale_examples=True -D sphinx_gallery_conf.filename_pattern='my_example_name'"
This command will cause any examples matching the filename pattern
'my_example_name' to be rebuilt, regardless of their MD5 hashes.
Passing command line arguments to example scripts#
By default, Sphinx-Gallery will not pass any command line arguments to example
scripts. By setting the reset_argv option, it is possible to change this
behavior and pass command line arguments to example scripts. reset_argv
needs to be a Callable that accepts the gallery_conf and script_vars
dictionaries as input and returns a list of strings that are passed as
additional command line arguments to the interpreter.
A reset_argv example could be:
from pathlib import Path

def reset_argv(sphinx_gallery_conf, script_vars):
    src_file = Path(script_vars['src_file']).name
    if src_file == 'example1.py':
        return ['-a', '1']
    elif src_file == 'example2.py':
        return ['-a', '2']
    else:
        return []
This function is defined in doc/sphinxext.py and we ensured that it is importable
(see Importing callables).
This can be included in the configuration dictionary as:
sphinx_gallery_conf = {
    ...
    'reset_argv': "sphinxext.reset_argv",
}
which is then resolved by Sphinx-Gallery to the callable reset_argv and used as:
import sys
sys.argv[0] = script_vars['src_file']
sys.argv[1:] = reset_argv(gallery_conf, script_vars)
Note
For backwards compatibility you can also set your configuration to be a callable
object but you will have to ensure that the __repr__ is stable across runs.
See Ensuring a stable __repr__.
Sorting gallery subsections#
Gallery subsections (aka sub-galleries) are sorted by default alphabetically by
their folder name, and as such you can always organize them by changing your folder
names. Alternatively, you can specify the order via the config value
subsection_order by providing a list of the subsections as paths
relative to conf.py in the desired order:
sphinx_gallery_conf = {
    ...
    'examples_dirs': ['../examples','../tutorials'],
    'subsection_order': ['../examples/sin_func',
                         '../examples/no_output',
                         '../tutorials/seaborn'],
}
Here we build 2 main galleries examples and tutorials, each of them
with subsections. You must list all subsections. If that’s too cumbersome,
one entry can be “*”, which will collect all not-listed subsections, e.g.
["first_subsection", "*", "last_subsection"].
Even more generally, you can set subsection_order to any callable, which
will be used as the sorting key function on the subsection folder paths (relative
to the conf.py file). See Custom sort keys for more information.
In fact, the
above list is a convenience shortcut and it is internally wrapped in
sphinx_gallery.sorting.ExplicitOrder as a sortkey.
Note
Sphinx-Gallery <0.16.0 required to wrap the list in
ExplicitOrder
from sphinx_gallery.sorting import ExplicitOrder
sphinx_gallery_conf = {
    ...
    'subsection_order': ExplicitOrder([...])
}
This pattern is discouraged in favor of passing the simple list.
Keep in mind that we use a single sort key for all the galleries that are built, thus we include the prefix of each gallery in the corresponding subsection folders. One does not define a sortkey per gallery. You can use Linux paths, and if your documentation is built in a Windows system, paths will be transformed to work accordingly, the converse does not hold.
Sorting gallery examples#
Within a given gallery (sub)section, the example files are ordered by
using the standard sorted() function with the key argument by default
set to
NumberOfCodeLinesSortKey(src_dir),
which sorts the files based on the number of code lines:
sphinx_gallery_conf = {
    ...
    'within_subsection_order': "NumberOfCodeLinesSortKey",
}
Built in convenience classes supported by within_subsection_order:
sphinx_gallery.sorting.NumberOfCodeLinesSortKey(default) to sort by the number of code lines.sphinx_gallery.sorting.FileSizeSortKeyto sort by file size.sphinx_gallery.sorting.FileNameSortKeyto sort by file name.sphinx_gallery.sorting.ExampleTitleSortKeyto sort by example title.
These built in Sphinx-Gallery classes can be specified using just the classname as
a string, e.g., "FileSizeSortKey". It is functionally equivalent to providing the
fully qualified name string "sphinx_gallery.sorting.NumberOfCodeLinesSortKey"
or importing and passing the class. See Importing callables for details.
You can also pass your own custom sort key callable, which will be used to sort the full paths to example files in the (sub)section. See Custom sort keys for more information.
Note
For backwards compatibility, within_subsection_order can also be a
class, which will be instantiated with the full path to the output directory;
gallery_dir.
Add intersphinx links to your examples#
Sphinx-Gallery enables you to add hyperlinks to the code blocks in your example files. This links functions/methods/attributes/objects/classes used, to their matching online documentation.
Such code snippets within the gallery appear like this:
y = np.sin(x)
Note
Sphinx-Gallery does not manage hyperlinks in reST text blocks. These
depend on your Sphinx setup. If your project uses sphinx.ext.intersphinx,
hyperlinks to external modules will be added to text blocks, similar to a normal
Sphinx reST documentation file.
If you use the Sphinx extension sphinx.ext.intersphinx, entries in
the intersphinx inventory will automatically be used for linking inside
code blocks. If you wish to add or over-ride any intersphinx module, you can
use the Sphinx-Gallery reference_url configuration.
reference_url accepts a dictionary where the key is the module name string and
value is the URL to the module’s documentation directory page, containing
searchindex.js, such as 'matplotlib': 'https://matplotlib.org'.
To link the local module, use None as the value, as shown below:
sphinx_gallery_conf = {
    ...
    'reference_url': {
         # The module you locally document uses None
        'sphinx_gallery': None,
    }
}
To add links to code blocks in plain reST example files inside galleries, see Plain reST examples.
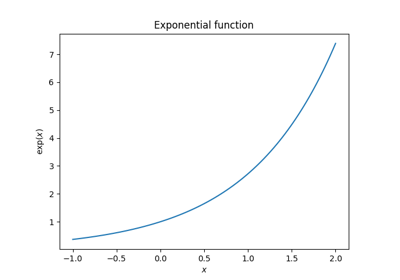
Have a look at this functionality in full action in our example Introductory example - Plotting sin.
Resolving module paths#
When finding links to objects we use, by default, the shortest module path,
checking that it still directs to the same object. This is because it is common
for a class that is defined in a deeper module to be documented in a shallower
one because it is imported in a higher level modules’ __init__.py (thus
that’s the namespace users expect it to be).
However, if you are using inherited classes in your code and are experiencing
incorrect links in the sense that links point to the base class of an object
instead of the child, the option prefer_full_module might solve your issue.
See the GitHub
issue
for more context.
To make this work in your documentation you need to include
prefer_full_module in the Sphinx-Gallery configuration dictionary in
conf.py:
sphinx_gallery_conf = {
    ...
    # Regexes to match the fully qualified names of objects where the full
    # module name should be used. To use full names for all objects use: '.*'
    'prefer_full_module': {r'module\.submodule'}
}
In the above example, all fully qualified names matching the regex
'module\.submodule' would use the full module name
(e.g., module.submodule.meth) when creating links, instead of the short module
name (e.g., module.meth). All others will use the (default) way of linking.
Add mini-galleries#
Sphinx-Gallery provides the sphinx_gallery.directives.MiniGallery
directive so that you can easily add a gallery of specific examples,
a ‘mini-gallery’, to your reST. This directive works in both reST text blocks in
examples and .rst files.
The minigallery directive supports passing a list, as a space separated directive argument or in the body of the directive. There are two ways to specify examples to include in the mini-gallery:
via fully qualified names of object (see Add mini-galleries for API documentation) - this adds all examples where the object was used in the code or referenced in the example text
via pathlike strings to example Python files, including glob-style (see Create mini-galleries using file paths)
To use object names, you must enable backreference generation, see
Add mini-galleries for API documentation for details.
If backreference generation is not enabled, object entries to the
MiniGallery directive will be ignored
and all entries will be treated as pathlike strings or glob-style pathlike strings.
See Create mini-galleries using file paths for details.
For example, the reST below will add a mini-gallery that includes all
examples that use or reference the specific function numpy.exp, the example
examples/plot_sin_.py, and all example files matching the string
/examples/plot_4*:
.. minigallery:: numpy.exp ../examples/plot_0_sin.py ../examples/plot_4*
All relevant examples will be merged into a single mini-gallery. The mini-gallery will only be shown if the files exist or the items are actually used or referred to in an example. Sphinx-Gallery will prevent duplication, ensuring that examples ‘passed’ more than once (e.g., one example uses a passed object and matches a passed file string) will only appear once in the mini-gallery.
You can also sort the examples in your mini-galleries. See Sort mini-gallery thumbnails from files for details.
The mini-gallery directive also supports the following options:
add-heading- adds a heading to the mini-gallery.The default heading for a mini-gallery with a single passed argument is: “Examples using {full qualified object name}”.
The default heading for a mini-gallery with multiple passed arguments is: “Examples of one of multiple objects”.
heading-level- specify the heading level. Accepts a single character (e.g.,-).
For example, the following reST adds the heading “My examples”, with heading
level -. It also shows how to pass inputs in the body of the directive (instead of
as directive arguments).
.. minigallery::
    :add-heading: My examples
    :heading-level: -

    numpy.exp
    ../examples/plot_0_sin.py
    ../examples/plot_4*
Add mini-galleries for API documentation#
Sphinx-Gallery can generate minigalleries for objects from specified modules, consisting of all examples that either:
Use the function/method/attribute/object or instantiate the class in the code (called implicit backreferences) or
Refer to that function/method/attribute/object/class using sphinx markup
:func:/:meth:/:attr:/:obj:/:class:in a text block. You can omit this role markup if you have set the default_role in yourconf.pyto any of these roles (called explicit backreferences).
This allows you to pass a fully qualified name of an object (e.g., function, method, attribute, class) to the minigallery directive to add a minigallery of all examples relevant to that object. This can be useful in API documentation.
Implicit backreferences are useful for auto-documenting objects that are used and classes that are explicitly instantiated, in the code. Any examples where an object is used in the code are added implicitly as backreferences.
Explicit backreferences are for objects that are explicitly referred to
in an example’s text. They are useful for classes that are
typically implicitly returned in the code rather than explicitly instantiated (e.g.,
matplotlib.axes.Axes which is most often instantiated only indirectly
within function calls).
For example, we can embed a small gallery of all examples that use or
refer to numpy.exp, which looks like this:
Examples using numpy.exp#

For such behavior to be available, set the following Sphinx-Gallery configurations
in your conf.py file:
Required
backreferences_dir- directory where object granular galleries are stored.This should be a string or
pathlib.Pathobject that is relative to theconf.pyfile, orNone.It is
Noneby default, which means that backrefererences are not generated.
doc_module- the modules for which you want object level galleries to be created.It should be a tuple of string module names.
Optional
exclude_implicit_doc- Regexes to match objects to exclude from implicit backreferences, as set of string regexes.The default option is an empty set, which will exclude nothing.
See exclude_implicit_doc for details.
For example:
sphinx_gallery_conf = {
    ...
    # directory where function/class granular galleries are stored
    'backreferences_dir'  : 'gen_modules/backreferences',

    # here we want to create backreferences for sphinx_gallery and numpy
    'doc_module'          : ('sphinx_gallery', 'numpy'),

    # Regexes to match objects to exclude from implicit backreferences.
    'exclude_implicit_doc': {r'pyplot\.show'},
}
The path you specify in backreferences_dir (here we choose
gen_modules/backreferences) will be populated with a file called
“backreferences_all.json”. This contains a mapping of all of all objects
belonging to the modules listed in doc_module and not excluded in
exclude_implicit_doc, to the examples where it was used or referenced.
Objects not used or referenced in any example are not included.
For backwards compatibility backreferences_dir will also be populated with
reST files for each object, named ‘<object>.examples’.
Each .rst file will contain a reduced version of the
gallery, containing examples where that “object” that is used.
‘<object>.examples’ files will be generated for all objects to prevent inclusion
errors. Empty ‘<object>.examples’ files are created for objects not used in any
example.
exclude_implicit_doc#
Sometimes, there are functions that are being used in practically every example
for the given module, for instance the pyplot.show or pyplot.subplots
functions in Matplotlib, so that a large number of often spurious examples will
be linked to these functions. To prevent this, you can exclude implicit
backreferences for certain objects by including them as regular expressions
in exclude_implicit_doc. The following setting will exclude any implicit
backreferences so that examples galleries are only created for objects
explicitly mentioned by Sphinx markup in a documentation block: {'.*'}.
To exclude the functions mentioned above you would use
{r'pyplot\.show', r'pyplot\.subplots'} (note the escape to match a dot
instead of any character, if the name is unambiguous you can also write
pyplot.show or just show).
Create mini-galleries using file paths#
Sometimes you may want to explicitly create a
mini-gallery using files that
do not have functions in common, for example a set of tutorials. The
mini-gallery directive therefore also supports passing in:
pathlike strings to sphinx gallery example files (relative to
conf.py)glob-style pathlike strings to Sphinx-Gallery example files (relative to
conf.py). For example, passing/examples/plot_4*will include all example files matching the above pattern.
Sort mini-gallery thumbnails from files#
The minigallery directive generates a gallery of
thumbnails corresponding to the input file strings or object names.
You can specify minigallery thumbnails order via the minigallery_sort_order
configuration, which gets passed to the sorted() key parameter when
sorting all minigalleries.
Sorting is done on the full paths to all the gallery examples (e.g.,
path/to/plot_example.py) that correspond to the inputs.
See Custom sort keys for details on writing a custom sort key.
For example, to put all example thumbnails starting with "plot_numpy_" at the start,
we could define the function below in doc/sphinxext.py (note False gets sorted
ahead of True as 0 is less than 1):
def function_sorter(x)
    return (not Path(x).name.starts_with("plot_numpy_"), x)::
We can then set the configuration to be (ensuring the function is importable):
sphinx_gallery_conf = {
    #...,
    "minigallery_sort_order": "sphinxext.function_sorter",
    #...
}
Sphinx-Gallery would resolve "sphinxext.function_sorter" to the
function_sorter object.
Note that you can only define one sorting key for all minigalleries.
Auto-documenting your API with links to examples#
The previous feature can be automated for all your modules combining
it with the standard sphinx extensions autodoc and
autosummary.
First enable them in your conf.py extensions list:
import sphinx_gallery
extensions = [
    ...
    'sphinx.ext.autodoc',
    'sphinx.ext.autosummary',
    'sphinx_gallery.gen_gallery',
    ]

# generate autosummary even if no references
autosummary_generate = True
autodoc and
autosummary
are very powerful extensions, please read about them. In this example we’ll
explain how the Sphinx-Gallery API Reference is automatically generated. The
documentation is done at the module level. We first start with the
reference.rst file
.. _sphx_glr_api_reference:

Sphinx-Gallery API Reference
============================

.. note::
   Sphinx-Gallery is typically used indirectly via Sphinx execution and
   configuration variables, see :ref:`configuration` for how to do this.
   However, as a standard  Python project, we document many functions and
   classes as well below, even though these will typically not be needed
   by end users.

.. currentmodule:: sphinx_gallery

.. automodule:: sphinx_gallery
   :no-members:
   :no-inherited-members:

:py:mod:`sphinx_gallery`:

.. autosummary::
   :toctree: gen_modules/
   :template: module.rst

   gen_gallery
   backreferences
   gen_rst
   scrapers
   py_source_parser
   block_parser
   docs_resolv
   notebook
   downloads
   sorting
   interactive_example
   directives

.. currentmodule:: sphinx_gallery.utils

.. automodule:: sphinx_gallery.utils
   :no-members:
   :no-inherited-members:

:py:mod:`sphinx_gallery.utils`:

.. autosummary::
   :toctree: gen_modules/
   :template: module.rst

   optipng
The important directives are currentmodule where we specify which
module we are documenting, for our purpose is sphinx_gallery. The
autosummary directive is responsible for generating the rst
files documenting each module. autosummary takes the option
toctree which is where the rst files are saved and template
which is the file that describes how the module rst documentation
file is to be constructed, finally we write the modules we wish to
document, in this case all modules of Sphinx-Gallery.
The template file module.rst for the autosummary directive has
to be saved in the path _templates/module.rst. We present our
configuration in the following block. The most relevant part is the
loop defined between lines 12-21 that parses all the functions/classes
of the module. There we have used the minigallery directive introduced in
the previous section.
We also add a cross referencing label (on line 16) before including the
examples mini-gallery. This enables you to reference the mini-gallery for
all functions/classes of the module using
:ref:`sphx_glr_backref_<fun/class>`, where ‘<fun/class>’ is the full path
to the function/class using dot notation (e.g.,
sphinx_gallery.backreferences.identify_names). For example, see:
Examples using sphinx_gallery.backreferences.identify_names.
 1{{ fullname }}
 2{{ underline }}
 3
 4.. automodule:: {{ fullname }}
 5
 6   {% block functions %}
 7   {% if functions %}
 8
 9   Functions
10   ---------
11
12   {% for item in functions %}
13
14   .. autofunction:: {{ item }}
15
16   .. _sphx_glr_backref_{{fullname}}.{{item}}:
17
18   .. minigallery:: {{fullname}}.{{item}}
19       :add-heading:
20
21   {%- endfor %}
22   {% endif %}
23   {% endblock %}
24
25   {% block classes %}
26   {% if classes %}
27
28   Classes
29   -------
30
31   {% for item in classes %}
32   .. autoclass:: {{ item }}
33      :members:
34
35   .. _sphx_glr_backref_{{fullname}}.{{item}}:
36
37   .. minigallery:: {{fullname}}.{{item}}
38       :add-heading:
39
40   {%- endfor %}
41   {% endif %}
42   {% endblock %}
43
44   {% block exceptions %}
45   {% if exceptions %}
46
47   Exceptions
48   ----------
49
50   .. autosummary::
51   {% for item in exceptions %}
52      {{ item }}
53   {%- endfor %}
54   {% endif %}
55   {% endblock %}
Toggling global variable inspection#
By default, Sphinx-Gallery will inspect global variables (and code objects) at the end of each code block to try to find classes of variables and method calls. It also tries to find methods called on classes. For example, this code:
lst = [1, 2]
fig, ax = plt.subplots()
ax.plot(lst)
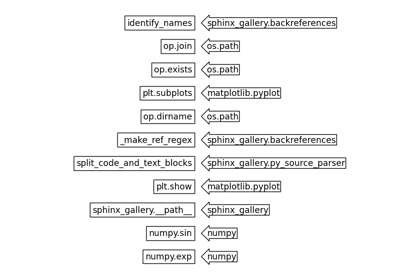
should end up with the following links (assuming intersphinx is set up properly):
However, this feature might not work properly in all instances. Moreover, if variable names get reused in the same script to refer to different classes, it will break.
To disable this global variable introspection, you can use the configuration key:
sphinx_gallery_conf = {
    ...
    'inspect_global_variables'  : False,
}
Stylizing code links using CSS#
Each link in the code blocks will be decorated with two or three CSS classes.
sphx-glr-backref-module-*CSS class named after the module where the object is documented.
*represents the module, e.g.,sphx-glr-backref-module-matplotlib-figure.
sphx-glr-backref-type-*CSS class named after the type of the object, where
*represents the object type. This is a sanitized intersphinx type, e.g., apy:classwill have the CSS classsphx-glr-backref-type-py-class.
sphx-glr-backref-instanceThe third ‘optional’ class that is added only if the object is an instance of a class (rather than, e.g., a class itself, method, or function). By default, Sphinx-Gallery adds the following CSS in
gallery.css:a.sphx-glr-backref-instance { text-decoration: none; }
This is done to reduce the visual impact of instance linking in example code. This means that for the following code:
x = Figure()
x, an instance of a class, will have thesphx-glr-backref-instanceCSS class, and will not be decorated.Figurehowever, is a class, so will not have thesphx-glr-backref-instanceCSS class, and will thus be decorated the standard way for links in the given parent styles.
These three CSS classes are meant to give fine-grained control over how
different links are decorated. For example, using CSS selectors you could
choose to avoid highlighting any sphx-glr-backref-* links except for ones
that you allowlist (e.g., those from your own module). For example, the
following css prevents any module except for matplotlib from being decorated:
a[class^="sphx-glr-backref-module-"] {
    text-decoration: none;
    color: inherit;
}
a[class^="sphx-glr-backref-module-matplotlib"] {
    text-decoration: underline;
}
There are likely elements other than text-decoration that might be worth
setting, as well.
You can add these CSS classes by including your own CSS file via the Sphinx
configuration html_static_path, which will override the
default CSS classes in Sphinx-Gallery CSS files.
Using a custom default thumbnail#
In case you want to use your own image for the thumbnail of examples that do
not generate any plot, you can specify it by editing your Sphinx conf.py
file. You need to add to the configuration dictionary a key called
default_thumb_file. For example:
sphinx_gallery_conf = {
    ...
    'default_thumb_file': 'path/to/thumb/file.png',
}
Adding line numbers to examples#
Line numbers can be displayed in listings by adding the global line_numbers
setting:
sphinx_gallery_conf = {
    ...
    'line_numbers': True,
}
or by adding a comment to the example script, which overrides any global setting:
# sphinx_gallery_line_numbers = True
Removing config comments#
Some configurations can be specified within a file by adding a special
comment with the pattern # sphinx_gallery_config [= value] to the
example source files. By default, the source files are parsed as is and thus
the comment will appear in the example.
To remove the comment from the rendered example set the option:
sphinx_gallery_conf = {
    ...
    'remove_config_comments': True,
}
This only removes configuration comments from code blocks, not from text blocks. However, note that technically, file-level configuration comments will work when put in either code blocks or text blocks.
Add your own first and last notebook cell#
Sphinx-Gallery allows you to add your own first and/or last cell to every
generated notebook. Adding a first cell can be useful for including code that
is required to run properly in the notebook, but not in a .py file. By
default, no first cell is added.
Adding a last cell can be useful for performing a desired action such as reporting on the user’s environment. By default no last cell is added.
You can choose whatever text you like by modifying the first_notebook_cell
and last_notebook_cell configuration parameters. For example, you can add
the following first cell:
# This cell is added by Sphinx-Gallery
# It can be customized to whatever you like
Which is achieved by the following configuration:
sphinx_gallery_conf = {
    ...
    'first_notebook_cell': ("# This cell is added by Sphinx-Gallery\n"
                            "# It can be customized to whatever you like\n"
                            )
}
A last cell may be added similarly by setting the last_notebook_cell
parameter:
sphinx_gallery_conf = {
    ...
    'first_notebook_cell': ("# This cell is added by Sphinx-Gallery\n"
                            "# It can be customized to whatever you like\n"
                            ),
    'last_notebook_cell': "# This is the last cell",
}
If the value of first_notebook_cell or last_notebook_cell is set to
None, then no extra first or last cell will be added to the notebook.
Adding images to notebooks#
When notebooks are produced, by default (notebook_images = False) image
paths from the image directive in reST documentation blocks (not images
generated from code) are included in markdown using their original paths. This
includes paths to images expected to be present on the local filesystem which
is unlikely to be the case for those downloading the notebook.
By setting notebook_images = True, images will be embedded in the generated
notebooks via Base64-encoded data URIs.
As inclusion of images via data URIs can significantly increase size of the
notebook, it’s suggested this only be used when small images are used throughout
galleries.
An alternative is to instead provide a prefix string that’ll be used for images e.g. the root URL of where your documentation is hosted. So for example the following configuration:
sphinx_gallery_conf = {
    ...
    'examples_dirs': ['../examples'],
    'gallery_dirs': ['auto_examples'],
    ...
    'notebook_images': 'https://project.example.com/en/latest/',
    ...
}
with an example image directive in an reST documentation block being:
.. image:: ../_static/example.jpg
    :alt: An example image
The image will be added to the generated notebook pointing to the source URL
https://project.example.com/en/latest/_static/example.jpg. Note the image
path in the reST examples above is a relative path, therefore the URL doesn’t
contain auto_examples as ../ moved up a directory to the documentation
source directory. Both relative and absolute (from source directory) paths are
supported; so in the example above /_static/example.jpg would have resulted
in the same URL being produced.
Note that the prefix is applied directly, so a trailing / should be
included in the prefix if it’s required.
Tip
If building multiple versions of your documentation on a hosted service and using prefix, consider using Sphinx build -D command line option to ensure links point to the correct version. For example:
sphinx-build \
    -b html \
    -D sphinx_gallery_conf.notebook_images="https://project.example.com/docs/${VERSION}/" \
    source_dir build_dir
Using pypandoc to convert reST to markdown#
Sphinx-Gallery can use pypandoc
(if installed) to convert reST text blocks to markdown for the iPython
notebooks (.ipynb files) generated for each example. These are made
available for download, along with the raw .py version, at the bottom
of each example.
The Sphinx-Gallery reST to markdown converter has limited support for more
complex reST syntax. If your examples have more complex reST, pypandoc may
produce better results. By default, the ‘pypandoc’ configuration is set to
False and pypandoc is not used.
To use pypandoc you can set:
sphinx_gallery_conf = {
    ...
    'pypandoc': True,
}
You can also use pandoc options by setting the pypandoc.convert_text()
parameters extra_args and filters. To use these parameters, set the
‘pypandoc’ configuration to be a dictionary of keyword argument(s):
sphinx_gallery_conf = {
    ...
    'pypandoc': {'extra_args': ['--mathjax',],
                 'filters': ['pandoc-citeproc',],
}
Warning
Certain pandoc options may result in undesirable effects. Use with caution.
Using JUnit XML files#
Sphinx-Gallery can create a JUnit XML file of your example run times,
successes, and failures. Set junit configuration to the value of your
desired JUnit file path, relative to the HTML output directory (which is by
default /_build/html relative to your conf.py file).
For example, assuming output directory is the default, the configuration below creates
a file junit.xml in doc/_build/test-results/sphinx-gallery/:
sphinx_gallery_conf = {
    ...
    'junit': '../test-results/sphinx-gallery/junit.xml',
}
By default, JUnit XML file generation is disabled (default value is: 'junit': '').
Integration with CircleCI#
JUnit XML files are useful for example on CircleCI builds, where you can add
a line like this to get a summary of your example run times in the CircleCI GUI
(which will parse the file path
doc/_build/test-results/sphinx-gallery/junit.xml and infer the tests
came from sphinx-gallery based on the nested subdirectory name):
- store_test_results:
    path: doc/_build/test-results
- store_artifacts:
    path: doc/_build/test-results
For more information on CircleCI integration, peruse the related CircleCI doc and blog post.
Parsing the XML file#
The JUnit XML file can also be parsed manually, e.g. to generate parametrized
test cases with pytest to limit the maximum execution time. The following
code block parses the XML file to create a list of test case dictionaries with
the execution time(s).
from xml.etree.ElementTree import parse

xml_path =  "doc/_build/html/sphinx-gallery/junit-results.xml"
test_cases = [dict(case.attrib) for case in parse(xml_path).getroot().iterfind("testcase")]

print(test_cases[0]["time"])
0.10358190536499023
Setting log level#
Sphinx-Gallery logs output at several stages. Warnings can be generated for
code that requires case sensitivity (e.g., plt.subplot and plt.Subplot)
when building docs on a filesystem that does not support case sensitive
naming (e.g., Windows). In this case, by default a logger.warning is
emitted, which will lead to a build failure when building with -W.
The log level can be set with:
sphinx_gallery_conf = {
    ...
    'log_level': {'backreference_missing': 'warning'},
}
The only valid key currently is backreference_missing.
The valid values are 'debug', 'info', 'warning', and 'error'.
Choosing the thumbnail image#
For examples that generate multiple figures, the default behavior will use the first figure created in each as the thumbnail image displayed in the gallery. To change the thumbnail image to a figure generated later in an example script, add a comment to the example script to specify the number of the figure you would like to use as the thumbnail. For example, to use the 2nd figure created as the thumbnail:
# sphinx_gallery_thumbnail_number = 2
You can also use negative numbers, which counts from the last figure. For example -1 means using the last figure created in the example as the thumbnail:
# sphinx_gallery_thumbnail_number = -1
The default behavior is sphinx_gallery_thumbnail_number = 1. See
Choosing the thumbnail figure for an example
of this functionality.
Providing an image for the thumbnail image#
An arbitrary image can be used to serve as the thumbnail image for an example.
To specify an image to serve as the thumbnail, add a comment to the example
script specifying the path to the desired image. The path to the image should
be relative to the conf.py file and the comment should be somewhere
below the docstring (ideally in a code block, see
Removing config comments).
For example, the following defines that the image demo.png in the folder
_static/ should be used to create the thumbnail:
# sphinx_gallery_thumbnail_path = '_static/demo.png'
Note that sphinx_gallery_thumbnail_number overrules
sphinx_gallery_thumbnail_path. See
Providing a figure for the thumbnail image for an example of
this functionality.
Controlling thumbnail behaviour in failing examples#
By default, expected failing examples will have their thumbnail image as a
stamp with the word “BROKEN”. This behaviour is controlled by
sphinx_gallery_failing_thumbnail, which is by default True. In cases
where control over the thumbnail image is desired, this should be set to
False. This will return thumbnail behaviour to ‘normal’, whereby
thumbnail will be either the first figure created (or the
default thumbnail if no figure is created)
or provided thumbnail:
# sphinx_gallery_failing_thumbnail = False
Compare the thumbnails of
Example that fails to execute (with normal thumbnail behaviour) (where the
option is False) and Example that fails to execute
(where the option is the default True) for an example of this
functionality.
Generate Binder links for gallery notebooks (experimental)#
Sphinx-Gallery automatically generates Jupyter notebooks for any examples built with the gallery. Binder makes it possible to create interactive GitHub repositories that connect to cloud resources.
If you host your documentation on a GitHub repository, it is possible to auto-generate a Binder link for each notebook. Clicking this link will take users to a live version of the Jupyter notebook where they may run the code interactively. For more information see the Binder documentation.
Warning
Binder is still beta technology, so there may be instability in the experience of users who click Binder links.
In order to enable Binder links with Sphinx-Gallery, you must specify
a few pieces of information in conf.py. These are given as a nested
dictionary following the pattern below:
sphinx_gallery_conf = {
  ...
  'binder': {
     # Required keys
     'org': '<github_org>',
     'repo': '<github_repo>',
     'branch': '<github_branch>', # Can be any branch, tag, or commit hash. Use a branch that hosts your docs.
     'binderhub_url': '<binder_url>', # Any URL of a binderhub deployment. Must be full URL (e.g. https://mybinder.org).
     'dependencies': '<list_of_paths_to_dependency_files>',
     # Optional keys
     'filepath_prefix': '<prefix>' # A prefix to prepend to any filepaths in Binder links.
     'notebooks_dir': '<notebooks-directory-name>' # Jupyter notebooks for Binder will be copied to this directory (relative to built documentation root).
     'use_jupyter_lab': <bool> # Whether Binder links should start Jupyter Lab instead of the Jupyter Notebook interface.
     }
}
If a Sphinx-Gallery configuration for Binder is discovered, the following extra things will happen:
The dependency files specified in
dependencieswill be copied to abinder/folder in your built documentation.The built Jupyter Notebooks from the documentation will be copied to a folder called
<notebooks_dir/>at the root of your built documentation (they will follow the same folder hierarchy within the notebooks directory folder.The reST output of each Sphinx-Gallery example will now have a
launch binderbutton in it.That button will point to a binder link with the following structure
<binderhub_url>/v2/gh/<org>/<repo>/<ref>?filepath=<filepath_prefix>/<notebooks_dir>/path/to/notebook.ipynb
Below is a more complete explanation of each field.
- org (type: string)
The GitHub organization where your documentation is stored.
- repo (type: string)
The GitHub repository where your documentation is stored.
- branch (type: string)
A reference to the version of your repository where your documentation exists. For example, if your built documentation is stored on a
gh-pagesbranch, then this field should be set togh-pages.- binderhub_url (type: string)
The full URL to a BinderHub deployment where you want your examples to run. One public BinderHub deployment is at
https://mybinder.org, though if you (and your users) have access to another, this can be configured with this field.- dependencies (type: list)
A list of paths (relative to
conf.py) to dependency files that Binder uses to infer the environment needed to run your examples. For example, arequirements.txtfile. These will be copied into a folder calledbinder/in your built documentation folder. For a list of all the possible dependency files you can use, see the Binder configuration documentation.- filepath_prefix (type: string | None, default:
None) A prefix to append to the filepath in the Binder links. You should use this if you will store your built documentation in a sub-folder of a repository, instead of in the root.
- notebooks_dir (type: string, default:
notebooks) The name of a folder where the built Jupyter notebooks will be copied. This ensures that all the notebooks are in one place (though they retain their folder hierarchy) in case you’d like users to browse multiple notebook examples in one session.
- use_jupyter_lab (type: bool, default:
False) Whether the default interface activated by the Binder link will be for Jupyter Lab or the classic Jupyter Notebook interface.
Each generated Jupyter Notebook will be copied to the folder
specified in notebooks_dir. This will be a subfolder of the sphinx output
directory and included with your site build.
Binder links will point to these notebooks.
Note
It is not currently possible to host notebooks generated by Sphinx-Gallery with readthedocs.org, as RTD does not provide you with a GitHub repository you could link Binder to. If you’d like to use readthedocs with Sphinx-Gallery and Binder links, you should independently build your documentation and host it on a GitHub branch as well as building it with readthedocs.
See the Sphinx-Gallery Sphinx configuration file for an example that uses the public Binder server.
Generate JupyterLite links for gallery notebooks (experimental)#
Sphinx-Gallery automatically generates Jupyter notebooks for any examples built with the gallery. JupyterLite makes it possible to run an example in your browser. The functionality is quite similar to Binder in the sense that you will get a Jupyter environment where you can run the example interactively as a notebook. The main differences from Binder are:
with JupyterLite, the example actually runs in your browser, there is no need for a separate machine in the cloud to run your Python code. That means that starting a Jupyter server is generally quicker, no need to wait for the Binder image to be built
with JupyterLite, the first imports take time. At the time of writing (December 2024)
import scipycan take ~15-30s. Some innocuously looking Python code may just not work and break in an unexpected fashion. The Jupyter kernel is based on Pyodide, see here for some Pyodide limitations.JupyterLite environments are not as flexible as Binder. For example, you can not use a Docker image, but only the default Pyodide environment. That means that some non pure-Python packages may not be available, see list of available packages in Pyodide.
Warning
JupyterLite is still beta technology and less mature than Binder, so there may be instability or unexpected behaviour in the experience of users who click JupyterLite links.
In order to enable JupyterLite links with Sphinx-Gallery, you need to install
the jupyterlite-sphinx package.
Recent versions of jupyterlite-sphinx and Sphinx-Gallery should be compatible,
with each other, but we recommend jupyterlite-sphinx>=0.17.1.
For jupyterlite-sphinx>=0.8 you also need to install
jupyterlite-pyodide-kernel. The latest released version is recommended, but
recent versions should work as well, this depends on the version of Pyodide
that you are using or planning to use.
You then need to add jupyterlite_sphinx to your Sphinx extensions in
conf.py:
extensions = [
    ...,
    'jupyterlite_sphinx',
]
You can configure JupyterLite integration by setting
sphinx_gallery_conf['jupyterlite'] in conf.py like this:
sphinx_gallery_conf = {
  ...
  'jupyterlite': {
     'use_jupyter_lab': <bool>, # Whether JupyterLite links should start Jupyter Lab instead of the Notebook interface.
     'notebook_modification_function': <str>, # fully qualified name of a function that implements JupyterLite-specific modifications of notebooks
     'jupyterlite_contents': <str>, # where to copy the example notebooks (relative to Sphinx source directory)
     }
}
Below is a more complete explanation of each field.
- use_jupyter_lab (type: bool, default:
True) Whether the default interface activated by the JupyterLite link will be for Jupyter Lab or the RetroLab Notebook interface.
- notebook_modification_function (type: str, default:
None) Fully qualified name of a function that implements JupyterLite-specific modifications of notebooks. By default, it is
Nonewhich means that notebooks are not going to be modified. Its signature should benotebook_modification_function(json_dict: dict, notebook_filename: str) -> Nonewherejson_dictis what you get when you dojson.load(open(notebook_filename)). The function is expected to modifyjson_dictin place by adding notebook cells. It is not expected to write to the file, sincesphinx-galleryis in charge of this.notebook_filenameis provided for convenience because it is useful to modify the notebook based on its filename. Potential usages of this function are installing additional packages with a%pip install seaborncode cell, or adding a markdown cell to indicate that a notebook is not expected to work inside JupyterLite, for example because it is using packages that are not packaged inside Pyodide. For backward compatibility it can also be a callable but this will not be cached properly as part of the environment by Sphinx.- jupyterlite_contents (type: string, default:
jupyterlite_contents) The name of a folder where the built Jupyter notebooks will be copied, relative to the Sphinx source directory. This is used as Jupyterlite contents.
You can set variables in conf.py to configure jupyterlite-sphinx, see
the jupyterlite-sphinx documentation for
more details.
If a Sphinx-Gallery configuration for JupyterLite is discovered, the following extra things will happen:
Configure
jupyterlite-sphinxwith some reasonable defaults, e.g. setjupyterlite_bind_ipynb_suffix = False.The built Jupyter Notebooks from the documentation will be copied to a folder called
<jupyterlite_contents>/(relative to Sphinx source directory)If
notebook_modification_functionis notNone, this function is going to add JupyterLite-specific modifications to notebooksThe reST output of each Sphinx-Gallery example will now have a
launch JupyterLitebutton in it.That button will point to a JupyterLite link which will start a Jupyter server in your browser with the current example as notebook
If, for some reason, you want to enable the jupyterlite-sphinx extension
but not use Sphinx-Gallery Jupyterlite integration you can do:
extensions = [
    ...,
    jupyterlite_sphinx,
]

sphinx_gallery_conf = {
  ...
  'jupyterlite': None
}
See the Sphinx-Gallery Sphinx configuration file for an example that uses the JupyterLite integration.
Controlling notebook download links#
By default, links to download Jupyter noteooks and launch Binder or JupyterLite (if
enabled) are shown only for Python examples. If parsing other file extensions has been
enabled (using the example_extensions option; see Parsing and executing examples via matching patterns), notebook
downloads can be enabled using the notebook_extensions option. For example:
sphinx_gallery_conf = {
    "notebook_extensions": {".py", ".jl"}
}
where the listed extensions are compared to file names in the gallery directory.
Note
Currently, all generated notebooks specify Python as the kernel. After downloading, the user will need to manually change to the correct kernel.
Making cell magic executable in notebooks#
Often times, tutorials will include bash code for the user to copy/paste into their terminal. This code should not be run when someone is building the documentation, as they will already have those dependencies in their environment. Hence they are normally written as code blocks inside text:
#%%
# Installing dependencies
#
#     .. code-block:: bash
#
#       pip install -q tensorflow
#       apt-get -qq install curl
This works fine for the .py and .html files, but causes problems when
rendered as an Jupyter notebook. The downloaded .ipynb file will not have
those dependencies installed, and will not work without running the bash code.
To fix this, we can set the promote_jupyter_magic flag in conf.py:
sphinx_gallery_conf = {
    ...
    'promote_jupyter_magic': True,
}
If this flag is True, then when a Jupyter notebook is being built, any code
block starting with Jupyter cell magics (e.g. %%bash or %%writefile)
will be turned into a runnable code block.
For our earlier example, we could change the Markdown text to:
#%%
# Installing dependencies
#
#     .. code-block:: bash
#
#       %%bash
#       pip install -q tensorflow
#       apt-get -qq install curl
meaning TensorFlow and Curl would be automatically installed upon running the Jupyter notebook. This works for any cell magic (not just those mentioned above) and only affects the creation of Jupyter notebooks.
Warning
It is good practice to ensure the .py and .html files match the .ipynb
files as closely as possible. This functionality should only be used when the
relevant code is intended to be executed by the end user.
Building without executing examples#
Sphinx-Gallery can parse all your examples and build the gallery without executing any of the scripts. This is just for speed visualization processes of the gallery and the size it takes your website to display, or any use you can imagine for it.
This can be done by setting the plot_gallery configuration in the
sphinx_gallery_conf dictionary inside your conf.py:
sphinx_gallery_conf = {
    ...
    'plot_gallery': 'False',
}
You can also change this via the
Sphinx build option -D,
which can be used to add a ‘no-plot’ target to your Makefile:
html-noplot:
    $(SPHINXBUILD) -D plot_gallery=0 -b html $(ALLSPHINXOPTS) $(SOURCEDIR) $(BUILDDIR)/html
    @echo
    @echo "Build finished. The HTML pages are in $(BUILDDIR)/html."
Remember that for Makefile white space is significant and the indentation are tabs
and not spaces.
The highest precedence is always given to the -D flag of the
sphinx-build command, which effectively makes the value set in your conf.py
file the ‘default’.
Note
If adding html-noplot to your Makefile, you will also need to
explicitly set the default value for plot_gallery in the
sphinx_gallery_conf dictionary inside your conf.py file to avoid
a sphinx configuration warning.
Compressing images#
When writing PNG files (the default scraper format), Sphinx-Gallery can be
configured to use optipng to optimize the PNG file sizes. Typically this
yields roughly a 50% reduction in file sizes, thus reducing the loading time
of galleries. However, it can increase build
time. The allowed values are 'images' and 'thumbnails', or a
tuple/list (to optimize both), such as:
sphinx_gallery_conf = {
    ...
    'compress_images': ('images', 'thumbnails'),
}
The default is () (no optimization) and a warning will be emitted if
optimization is requested but optipng is not available. You can also pass
additional command-line options (starting with '-'), for example to
optimize less but speed up the build time you could do:
sphinx_gallery_conf = {
    ...
    'compress_images': ('images', 'thumbnails', '-o1'),
}
See $ optipng --help for a complete list of options.
Multi-resolution images#
Web browsers allow a srcset parameter to the <img> tag that
allows the browser to support responsive resolution images
for hi-dpi/retina displays. Sphinx Gallery supports this via the
image_srcset parameter:
sphinx_gallery_conf = {
    ...
    'image_srcset': ["2x"],
}
that saves a 1x image at the normal figure dpi (usually 100 dpi) and a 2x
version at twice the density (e.g. 200 dpi). The default is no extra images
('image_srcset': []), and you can specify other resolutions if desired as a
list: ["2x", "1.5x"].
The matplotlib scraper creates a custom image directive, image-sg in the
rst file:
.. image-sg:: /examples/images/sphx_glr_test_001.png
    :alt: test
    :srcset: /examples/images/sphx_glr_test_001.png, /examples/images/sphx_glr_test_001_2_0x.png 2.0x
    :class: sphx-glr-single-img
This is converted to html by the custom directive as:
.. <img src="../_images/sphx_glr_test_001.png" alt="test", class="sphx-glr-single-img",
    srcset="../_images/sphx_glr_test_001.png, ../_images/sphx_glr_test_001_2_0x.png 2.0x>
This leads to a larger website, but clients that support the srcset tag will only
download the appropriate-sized images.
Note that the .. image-sg directive currently ignores other .. image
directive tags like width, height, and align. It also only works
with the html and latex builders.
Image scrapers#
Image scrapers are plugins that allow Sphinx-Gallery to detect images produced
during execution of your examples, and then embed them into documentation.
Scrapers can be activated by appending scraper names to the
'image_scrapers' tuple in your Sphinx-Gallery configuration. For example,
to scrape matplotlib images you can do:
sphinx_gallery_conf = {
    ...
    'image_scrapers': ('matplotlib',),
}
The default value is 'image_scrapers': ('matplotlib',) which only scrapes
Matplotlib images. Note that this includes any images produced by packages that
are based on Matplotlib, for example Seaborn or Yellowbrick.
Matplotlib animations#
If you wish to embed matplotlib.animation.Animations as animations rather
than a single static image of the animation figure, you should use the
matplotlib_animations configuration. It accepts either a bool, indicating whether
animations should be enabled, or a tuple of the format: (enabled: bool, format: str):
sphinx_gallery_conf = {
    ...
    'matplotlib_animations': (True, 'mp4'),
}
matplotlib_animations is False by default.
Any file format supported by Matplotlib for animations is allowed. If no format
is specified (i.e., it is a single bool), or it is None, then the format is
determined by rcParams['animation.html'] and related options in your
matplotlib rcParams.
This means that it can be set inside your code block, though note that Sphinx-Gallery
will reset Matplotib defaults before each example file executes (see
Resetting modules).
If the format is 'html5' or 'jshtml', the animation will effectively
be embedded in the resulting HTML file. Otherwise the animation will be saved
in an external file, thus reducing the size of the ReST file generated.
If you request a format that saves to an external file, you will need the
sphinxcontrib-video extension
installed in your environment.
Note that while matplotlib_animations allows you to set the
rcParams['animation.html'] globally, setting it inside a code block will
override the global setting.
It’s also recommended to ensure that “FFmpeg” or “imagemagick” is available as a
writer. Use
matplotlib.animation.ImageMagickWriter.isAvailable()
or
matplotlib.animation.FFMpegWriter.isAvailable()
to check.
We recommend FFMpeg writer, unless you are using Matplotlib <3.3.1.
Supported scrapers#
The following scrapers are supported:
- matplotlib
Sphinx-Gallery maintains a scraper for
matplotlibfigures via the string'matplotlib'.
- PyVista
PyVista maintains a scraper (for PyVista >= 0.20.3) enabled by the string
'pyvista'.
- PyGMT
See their website for more information on how to integrate with Sphinx-Gallery.
- qtgallery
This library provides a scraper for Qt windows. See their repository for instructions on integrating with Sphinx-Gallery.
- plotly
This library provides a scraper, though it is also possible to capture plotly figures using capture_repr configuration. See Example with the plotly graphing library for details.
It is possible to write custom scrapers for images generated by packages outside of those listed above. This is accomplished by writing your own Python function to define how to detect and retrieve images produced by an arbitrary package. For instructions, see Write a custom image scraper. If you come up with an implementation that would be useful for general use (e.g., a custom scraper for a plotting library) feel free to add it to the list above (see discussion here)!
Using multiple code blocks to create a single figure#
By default, images are scraped following each code block in an example. Thus, the following produces two plots, with one plot per code block:
# %%
# This first code block produces a plot with two lines

import matplotlib.pyplot as plt
plt.plot([1, 0])
plt.plot([0, 1])

# %%
# This second code block produces a plot with one line

plt.plot([2, 2])
plt.show()
However, sometimes it can be useful to use multiple code blocks to create a
single figure, particularly if the figure takes a large number commands that
would benefit from being interleaved with text blocks. The optional flag
sphinx_gallery_defer_figures can be inserted as a comment anywhere in a code
block to defer the scraping of images to the next code block (where it can be
further deferred, if desired). The following produces only one plot:
# %%
# This first code block does not produce any plot

import matplotlib.pyplot as plt
plt.plot([1, 0])
plt.plot([0, 1])
# sphinx_gallery_defer_figures

# %%
# This second code block produces a plot with three lines

plt.plot([2, 2])
plt.show()
Controlling the layout of multiple figures from the same code block#
By default, multiple figures generated from the same code block are stacked side-by-side. Particularly for wide figures, this can lead to cases where images are highly shrunk, losing their legibility. This behaviour can be controlled using two optional variables:
a file-wide
sphinx_gallery_multi_imagevariablea code block-specific
sphinx_gallery_multi_image_blockvariable
The default behaviour is to treat these variables as being set to "multi", which
causes figures to be stacked side-by-side. Setting these variables to "single" will
allow figures produced from a code block to be displayed as a single column.
For instance, adding:
# sphinx_gallery_multi_image = "single"
somewhere in an example file will cause images from all code blocks where multiple figures are produced to be displayed in a single column.
Alternatively, adding:
# sphinx_gallery_multi_image_block = "single"
to a code block will cause multiple figures from only that code block to be displayed in a single column.
Conversely, if sphinx_gallery_multi_image = "single" is set for the whole file,
adding sphinx_gallery_multi_image_block = "multi" can restore the default behaviour
for a single code block.
See the example Force plots to be displayed on separate lines for a demonstration of this functionality.
Hiding lines of code#
Normally, Sphinx-Gallery will render every line of Python code when building HTML and iPython notebooks. This is usually desirable, as we want to ensure the Python source files, HTML, and iPython notebooks all do the same thing.
However, it is sometimes useful to have Python code that runs, but is not
included in any user-facing documentation. For example, suppose we wanted to
add some assert statements to verify the docs were built successfully, but
did not want these shown to users. We could use the sphinx_gallery_start_ignore
and sphinx_gallery_end_ignore flags to achieve this:
model.compile()
# sphinx_gallery_start_ignore
assert len(model.layers) == 5
assert model.count_params() == 219058
# sphinx_gallery_end_ignore
model.fit()
When the HTML or iPython notebooks are built, this code block will be shown as:
model.compile()
model.fit()
The sphinx_gallery_start_ignore and sphinx_gallery_end_ignore flags may
be used in any code block, and multiple pairs of flags may be used in the same
block. Every start flag must always have a corresponding end flag, or an error
will be raised during doc generation. These flags and the code between them are
always removed, regardless of what remove_config_comments is set to.
Note that any output from the ignored code will still be captured.
Warning
This flag should be used sparingly, as it makes the .py source files less
equivalent to the generated .html and .ipynb files. It is bad practice
to use this when other methods that preserve this relationship are possible.
Generating dummy images#
For quick visualization of your gallery, especially during the writing process, Sphinx-Gallery allows you to build your gallery without executing the code (see Building without executing examples and filename/ignore patterns). This however, can cause warnings about missing image files if you have manually written links to automatically generated images. To prevent these warnings you can tell Sphinx-Gallery to create a number of dummy images for an example.
For example, you may have an example (‘my_example.py’) that generates 2 figures, which you then reference manually elsewhere, e.g.,:
Below is a great figure:

.. figure:: ../auto_examples/images/sphx_glr_my_example_001.png

Here is another one:

.. figure:: ../auto_examples/images/sphx_glr_my_example_002.png
To prevent missing image file warnings when building without executing, you can add the following to the example file:
# sphinx_gallery_dummy_images=2
This will cause Sphinx-Gallery to generate 2 dummy images with the same naming convention and stored in the same location as images that would be generated when building with execution. No dummy images will be generated if there are existing images (e.g., from a previous run of the build), so they will not be overwritten.
Note
This configuration only works when the example is set to not execute
(i.e., the plot_gallery is 'False', the example is in
ignore_pattern or the example is not in filename_pattern - see
filename/ignore patterns). This means that you will
not need to remove any sphinx_gallery_dummy_images lines in your
examples when you switch to building your gallery with execution.
Resetting modules#
Often you wish to “reset” the behavior of your visualization packages in order to ensure that any changes made to plotting behavior in one example do not propagate to the other examples.
By default, before each example file executes, Sphinx-Gallery will
reset matplotlib (by using matplotlib.pyplot.rcdefaults() and
reloading submodules that populate the units registry) and seaborn
(by trying to unload the module from sys.modules). This is equivalent to the
following configuration:
sphinx_gallery_conf = {
    ...
    'reset_modules': ('matplotlib', 'seaborn'),
}
Currently, Sphinx-Gallery natively supports resetting matplotlib and
seaborn. However, you can also add your own custom function to
this tuple in order to define resetting behavior for other visualization libraries.
To do so, follow the instructions in Resetting before each example.
Order of resetting modules#
By default, Sphinx-Gallery will reset modules before each example is run.
The choices for reset_modules_order are before (default), after, and
both. If the last example run in Sphinx-Gallery modifies a module, it is
recommended to use after or both to avoid leaking out a modified module to
other parts of the Sphinx build process. For example, set reset_modules_order
to both in the configuration:
sphinx_gallery_conf = {
    ...
    'reset_modules_order': 'both',
}
Custom functions can be constructed to have custom functionality depending on whether they are called before or after the examples. See Resetting before each example for more information.
Dealing with failing Gallery example scripts#
As your project evolves some of your example scripts might stop executing properly. Sphinx-Gallery will assist you in the discovery process of those bugged examples. The default behavior is to replace the thumbnail of those examples in the gallery with the broken thumbnail. That allows you to find with a quick glance of the gallery which examples failed. Broken examples remain accessible in the html view of the gallery and the traceback message is written for the failing code block. Refer to example Example that fails to execute to view the default behavior.
The build is also failed exiting with code 1 and giving you a summary of the failed examples with their respective traceback. This way you are aware of failing examples right after the build and can find them easily.
There are some additional options at your hand to deal with broken examples.
Abort build on first fail#
Sphinx-Gallery provides the early fail option. In
this mode the gallery build process breaks as soon as an exception
occurs in the execution of the examples scripts. This can by activated via the
abort_on_example_error configuration, which can be set sphinx_gallery_conf
dictionary inside your conf.py configuration file:
sphinx_gallery_conf = {
    ...
    'abort_on_example_error': True,
}
You can also change this via the
Sphinx build option -D,
which can be used to add a ‘abort_on_example_error’ target to your Makefile:
html_abort_on_example_error:
    $(SPHINXBUILD) -D abort_on_example_error=1 -b html $(ALLSPHINXOPTS) $(BUILDDIR)/html
    @echo
    @echo "Build finished. The HTML pages are in $(BUILDDIR)/html."
Remember that for Makefile white space is significant and the indentation
are tabs and not spaces.
The highest precedence is always given to the -D flag of the
sphinx-build command, which effectively makes the value set in your conf.py
file the ‘default’.
Don’t fail the build if specific examples error#
It might be the case that you want to keep the gallery even with failed examples. Thus you can configure Sphinx-Gallery to allow certain examples to fail and still exit with a 0 exit code. For this you need to list all the examples you want to allow to fail during build. Change your conf.py accordingly:
sphinx_gallery_conf = {
    ...
    'expected_failing_examples': ['../examples/plot_raise.py']
}
Here you list the examples you allow to fail during the build process, keep in mind to specify the full relative path from your conf.py to the example script.
Note
If an example is expected to fail, Sphinx-Gallery will error if the example runs without error.
Never fail the build on error#
Sphinx-Gallery can be configured to only log warnings when examples fail.
This means that sphinx will only exit with a non-zero exit code if the -W
flag is passed to sphinx-build. This can be enabled by setting:
sphinx_gallery_conf = {
    ...
    'only_warn_on_example_error': True
}
Build examples in parallel#
Sphinx-Gallery can be configured to run examples simultaneously using
joblib. This can be enabled by setting:
sphinx_gallery_conf = {
    ...
    'parallel': 2,
}
If an int, then that number of jobs will be passed to joblib.Parallel.
If True, then the same number of jobs will be used as the -j flag for
Sphinx.
Warnings emitted by joblib during documentation building (e.g., the
UserWarning about a
worker restarting) are emitted
during gallery generation at the same time as warnings from example
code execution. These can be filtered out with
warnings.filterwarnings (see Removing warnings). This is particularly
important to do if you have tweaked warning handling in your documentation build
to treat warnings as errors, e.g., with a line like
warnings.filterwarnings("error) which converts all warnings into errors. In
this case, if joblib emits a warning during build of an example, this example will fail
unexpectedly unless they are filtered out. Note that this differs from the warnings
affected by the - W / --fail-on-warning sphinx-build flag, which converts
Sphinx warnings during documentation building into errors.
Warning
Some packages might not play nicely with parallel processing, so this feature is considered experimental!
For example, you might need to set variables or call functions in a custom resetter to ensure that all spawned processes are properly set up and torn down. Parallelism is achieved through the Loky backend of joblib, see Embarrassingly parallel for loops for documentation of many relevant conisderations (e.g., pickling, oversubscription of CPU resources, etc.).
Using parallel building will also disable memory measurements.
Enabling the example recommender system#
Sphinx-Gallery can be configured to generate content-based recommendations for an example gallery. A list of related examples is automatically generated by computing the closest examples in the TF-IDF space of their text contents. Only examples within a single gallery (including it’s sub-galleries) are used to compute the closest examples. The most similar content is then displayed at the bottom of each example as a set of thumbnails.
The recommender system can be enabled by setting enable to True. To
configure it, pass a dictionary to the sphinx_gallery_conf, e.g.:
sphinx_gallery_conf = {
    ...
    "recommender": {"enable": True, "n_examples": 5, "min_df": 3, "max_df": 0.9},
}
The only necessary parameter is enable. If any other parameters is not
specified, the default value is used. Below is a more complete explanation of
each field:
- enable (type: bool, default: False)
Whether to generate recommendations inside the example gallery. Enabling this feature requires adding numpy to the dependencies.
- n_examples (type: int, default: 5)
Number of most relevant examples to display.
- min_df (type: float in range [0.0, 1.0] | int, default: 3)
When building the vocabulary ignore terms that have a document frequency strictly lower than the given threshold. If float, the parameter represents a proportion of documents, integer represents absolute counts. This value is also called cut-off in the literature.
- max_df (type: float in range [0.0, 1.0] | int, default: 0.9)
When building the vocabulary ignore terms that have a document frequency strictly higher than the given threshold. If float, the parameter represents a proportion of documents, integer represents absolute counts.
- rubric_header (type: str, default: “Related examples”)
Customizable rubric header. It can be edited to more descriptive text or to add external links, e.g. to the API doc of the recommender system on the Sphinx-Gallery documentation.
The parameters min_df and max_df can be customized by the user to trim
the very rare/very common words. This may improve the recommendations quality,
but more importantly, it spares some computation resources that would be wasted
on non-informative tokens.
Currently example recommendations are only computed for .py files.
Setting gallery thumbnail size#
By default Sphinx-Gallery will generate thumbnails at size (400, 280).
The thumbnail image will then be scaled to the size specified by
thumbnail_size, adding pillarboxes or letterboxes as necessary to
maintain the original aspect ratio. The default thumbnail_size is
(400, 280) (no scaling) and can be changed via the thumbnail_size
configuration, e.g.:
sphinx_gallery_conf = {
    ...
    'thumbnail_size': (250, 250),
}
The gallery uses various CSS classes to display these thumbnails, which
default to maximum 160x112px. To change this you can modify the default CSS by
including your own CSS file via the Sphinx configuration
html_static_path (which will override default CSS classes
in Sphinx-Gallery CSS files).
The following CSS would display the images at 250x250px instead of the default
160x112px:
.sphx-glr-thumbcontainer {
    min-height: 320px !important;
    margin: 20px !important;
}
.sphx-glr-thumbcontainer .figure {
    width: 250px !important;
}
.sphx-glr-thumbcontainer img {
    max-height: 250px !important;
    width: 250px !important;
}
.sphx-glr-thumbcontainer a.internal {
    padding: 270px 10px 0 !important;
}
Note
The default value of thumbnail_size will change from
(400, 280) (2.5x maximum specified by CSS) to (320, 224)
(2x maximum specified by CSS) in version 0.9.0. This is to
prevent unnecessary over-sampling.
Minimal reported time#
By default, Sphinx-Gallery logs and embeds in the html output the time it took to run each script. If the majority of your examples runs quickly, you may not need this information.
The min_reported_time parameter can be set to a number of seconds. The
duration of scripts that ran faster than that amount will not be logged nor
embedded in the html output.
Write computation times#
Set to False if you want to omit computation times from all gallery outputs.
This helps with reproducible builds.
Default is True unless the SOURCE_DATE_EPOCH environment variable is set.
If you are interested in using execution time and execution success and failure data, see Using JUnit XML files.
Showing memory consumption#
Sphinx-Gallery can use memory_profiler, if installed, to report the peak
memory during the run of an example. After installing memory_profiler,
you can do:
sphinx_gallery_conf = {
    ...
    'show_memory': True,
}
It’s also possible to use your own custom memory reporter, for example
if you would rather see the GPU memory. In that case, show_memory must
be a callable that takes a single function to call (i.e., one generated
internally to run an individual script code block), and returns a two-element
tuple containing:
The memory used in MiB while running the function, and
The function output
A version of this that would always report 0 memory used would be:
sphinx_gallery_conf = {
    ...
    'show_memory': lambda func: (0., func()),
}
Show signature#
By default, Sphinx-Gallery writes a Generated by … notice in the generated output.
The show_signature parameter can be used to disable it.
Controlling what output is captured#
Note
Configure capture_repr to be an empty tuple (i.e., capture_repr: ())
to return to the output capturing behaviour prior to release v0.5.0.
The capture_repr configuration allows the user to control what output
is captured, while executing the example .py files, and subsequently
incorporated into the built documentation. Data directed to standard output
is always captured. The value of the last statement of each code block, if
it is an expression, can also be captured. This can be done by providing
the name of the ‘representation’ method to be captured in the capture_repr
tuple, in order of preference. The representation methods currently supported
are:
__repr__- returns the official string representation of an object. This is what is returned when your Python shell evaluates an expression.__str__- returns a string containing a nicely printable representation of an object. This is what is used when youprint()an object or pass it toformat()._repr_html_- returns a HTML version of the object. This method is only present in some objects, for example, pandas dataframes.
Output capture can be controlled globally by the capture_repr configuration
setting, file-by-file by adding a comment to the example file, which overrides
any global setting:
# sphinx_gallery_capture_repr = ()
, or block-by-block by adding a comment to the code block, which overrides any global or file setting:
# sphinx_gallery_capture_repr_block = ()
The default setting is:
sphinx_gallery_conf = {
    ...
    'capture_repr': ('_repr_html_', '__repr__'),
}
With the default setting Sphinx-Gallery would first attempt to capture the
_repr_html_ of the last statement of a code block, if it is an
expression. If this method does not exist for the expression, the second
‘representation’ method in the tuple, __repr__, would be captured. If the
__repr__ also does not exist (unlikely for non-user defined objects),
nothing would be captured. Data directed to standard output is always
captured. For several examples, see Capturing output representations.
To capture only data directed to standard output, configure 'capture_repr'
to be an empty tuple: 'capture_repr': (). This will imitate the behaviour
of Sphinx-Gallery prior to v0.5.0.
From another perspective, take for example the following code block:
print('Hello world')
a=2
a  # this is an expression
'Hello world' would be captured for every capture_repr setting as this
is directed to standard output. Further,
if
capture_repris an empty tuple, nothing else would be captured.if
capture_repris('__repr__'),2would also be captured.if
capture_repris('_repr_html_', '__repr__')(the default) Sphinx-Gallery would first attempt to capture_repr_html_. Since this does not exist fora, it will then attempt to capture__repr__. The__repr__method does exist fora, thus2would be also captured in this case.
Matplotlib note: if the 'capture_repr' tuple includes '__repr__'
and/or '__str__', code blocks which have a Matplotlib function call as the
last expression will generally produce a yellow output box in the built
documentation, as well as the figure. This is because matplotlib function calls
usually return something as well as creating/amending the plot in standard
output. For example, matplotlib.plot() returns a list of Line2D objects
representing the plotted data. This list has a __repr__ and a __str__
method which would thus be captured. You can prevent this by:
assigning the (last) plotting function to a temporary variable. For example:
import matplotlib.pyplot as plt

_ = plt.plot([1, 2, 3, 4], [1, 4, 9, 16])
add
plt.show()(which does not return anything) to the end of your code block. For example:import matplotlib.pyplot as plt plt.plot([1, 2, 3, 4], [1, 4, 9, 16]) plt.show()
add a
# sphinx_gallery_capture_repr_block = ()comment to the code block. The unwanted string output will not occur if'capture_repr'is an empty tuple or, at least, does not contain__repr__or__str__. For example:# sphinx_gallery_capture_repr_block = () import matplotlib.pyplot as plt plt.plot([1, 2, 3, 4], [1, 4, 9, 16])
Note for Plotly users
The suggestions above also apply to Plotly users. Plotly figures have
several update methods that
implicitly return the updated figure object. You can set a block-level
# sphinx_gallery_capture_repr_block = () comment to prevent these
from being captured, or assign the return values to a variable (e.g.,
fig = fig.update_layout(...)).
Prevent capture of certain classes#
If you wish to capture a representation of the last expression of each code
blocks unless the last expression is of a certain type, you can use
'ignore_repr_types'. 'ignore_repr_types' is by default an empty raw
string (r''), meaning no types are ignored. To exclude specific type(s)
from being captured, 'ignore_repr_types' can be set to a regular
expression matching the name(s) of the type(s) to be excluded.
For example, the configuration below would capture the __repr__ of the
last expression of each code block unless the name of the type() of the last
expression includes the string ‘matplotlib.text’ or ‘matplotlib.axes’.
This would prevent capturing of all subclasses of ‘matplotlib.text’, e.g.
expressions of type ‘matplotlib.text.Annotation’, ‘matplotlib.text.OffsetFrom’
etc. Similarly subclasses of ‘matplotlib.axes’ (e.g. ‘matplotlib.axes.Axes’,
‘matplotlib.axes.Axes.plot’ etc.) will also not be captured.
sphinx_gallery_conf = {
    ...
    'capture_repr': ('__repr__'),
    'ignore_repr_types': r'matplotlib\.(text|axes)',
}
Nesting gallery sections#
nested_sections lets you control how gallery index.rst files are generated
when your gallery has subsections
(sub-folders inside examples_dirs, aka
sub-galleries). This can be useful for
controlling sidebar appearance. The default is set to nested_sections=True
because it generally works with the popular
pydata-sphinx-theme
theme. It can however, cause undesirable duplication in the sidebar with other
themes so users are advised to choose the most suitable nested_sections setting
for their theme.
With default nested_sections=True, Sphinx-Gallery will use the
GALLERY_HEADER.[ext] (or README.[ext] for backward-compatibility) files
for the parent gallery and each subsection to build separate index files for the
parent gallery and each subsection.
Subsection index files will contain the subsection’s header (from the
GALLERY_HEADER.[ext] file) and a toctree
linking to each gallery example in the subsection.
The parent gallery’s main index.rst file will contain, in sequence:
parent gallery header followed by gallery thumbnails,
a toctree linking to each gallery example in the parent gallery,
subsection header followed by subsection thumbnails, for all subsections,
a second toctree, at the end of the file, linking to all subsection index files.
The generated file structure and toctrees mimic that of the parent gallery folder, which may be needed for generating sidebars with nested sections for some themes.
For other themes, having two toctrees can cause undesirable duplication in the sidebar.
In this case you can try moving all parent gallery examples to their own sub-folder,
as this will result in a single toctree in the parent gallery index.rst, or
using nested_sections=False.
nested_sections=False makes Sphinx-Gallery behave as it used to
prior to version 0.10.2.
Specifically, it will generate a single index file for the whole gallery.
This index file will contain headers for the parent gallery and each subsection, with
each header followed by a toctree that links to every example in the
parent gallery/subsection.
For some themes, sidebars generated using these toctrees would list all gallery items
with a flat structure and not reflect the nested folder structure of sub-galleries.
Manually passing files#
By default, Sphinx-Gallery creates all the files that are written in the
sphinx-build directory, either by generating reST and images from a *.py
in the gallery-source, or from creating index.rst from
GALLERY_HEADER.rst (or README.[rst/txt] for backward-compatibility)
in the gallery-source. However, sometimes it is desirable to pass files
from the gallery-source to the sphinx-build. For example, you may want
to pass an image that a gallery refers to, but does not generate itself.
You may also want to pass raw reST from the gallery-source to the
sphinx-build, because that material fits in thematically with your gallery,
but is easier to write as reST. To accommodate this, you may set
copyfile_regex in sphinx_gallery_conf. The following copies
across reST files.
sphinx_gallery_conf = {
    ...
   'copyfile_regex': r'.*\.rst',
}
Note that if you copy across reST files, for instance, it is your
responsibility to ensure that they are in a sphinx toctree somewhere
in your document. You can, of course, add a toctree to your
GALLERY_HEADER.rst.
Manually passing index.rst#
You can bypass Sphinx-Gallery automatically creating an index.rst from a
GALLERY_HEADER.rst in a gallery directory or nested sub-gallery directory. If your
copyfile_regex includes index.rst, and you have an index.rst in the
gallery-source (i.e., a examples_dirs directory),
Sphinx-Gallery will use that instead and not make an index file for that gallery
or any of its sub-galleries.
If you pass your own index.rst file, you are responsible for
adding your own Sphinx toctree in that index (or elsewhere in your Sphinx
documentation) that includes any gallery items or other files in that
directory. You are also responsible for adding any necessary index.rst
files for that gallery’s sub-galleries.
The following is an example of index.rst that handles a gallery with
sub-galleries and can insert an example from one sub-gallery into another one
while preserving the nested structure in the TOC tree.:
Examples gallery
================

Subgallery 1
------------

.. toctree::
    :maxdepth: 2
    :glob:
    :hidden:

    subgallery1/plot_*

.. minigallery:: ../../examples/subgallery1/plot_*.py

Subgallery 2
------------

.. toctree::
    :maxdepth: 2
    :glob:
    :hidden:

    subgallery2/plot_*

.. minigallery::
    ../../examples/subgallery2/plot_*.py
    ../../examples/subgallery1/plot_example_in_both.py
Showing API Usage#
Graphs and documentation of both unused API entries and the examples that
each API entry is used in are generated in the sphinx output directory under
sg_api_usage.html. See the
Sphinx-Gallery API usage documentation and graphs
for example. In large projects, there are many modules and, since a graph
of API usage is generated for each module, this can use a lot of resources
so show_api_usage is set to 'unused' by default. The unused API
entries are all shown in one graph so this scales much better for large
projects. Setting show_api_usage to True will make one graph per
module showing all of the API entries connected to the example that they
are used in. This could be helpful for making a map of which examples to
look at if you want to learn about a particular module. Setting
show_api_usage to False will not make any graphs or documentation
about API usage. Note, graphviz is required for making the unused and
used API entry graphs.
Ignoring API entries#
By default, api_usage_ignore='.*__.*__' ignores files that match this
regular expression in documenting and graphing the usage of API entries
within the example gallery. This regular expression can be modified to
ignore any kind of file that should not be considered. The default regular
expression ignores functions like __len__() for which it may not be
desirable to document if they are used in examples.
Tagging Examples and Filtering#
You can tag examples with the:
# sphinx_gallery_tags = ["tag1", "tag2"]
syntax.
This adds the tags to the end of each example, and also adds dynamic filtering of the examples on index pages. See Basics Gallery with Matplotlib for a demonstration.
Tags support a wide character set, although some with special meaning
in HTML documents might not render correctly, specifically | and
@ are known not to work well.